

Edit Plan Values in Bulk
Quickly edit plan values using a third-party application and import the data back into Visier.
You can edit plan values
Download the plan as a CSV file
-
In the planning grid, switch to Segments view.
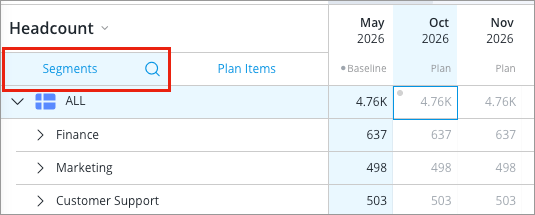
-
Select the plan item you want to edit plan values for using the Context picker. The exported CSV file will contain data that is similar to what is displayed in Segments view. Based on the selections in the following screenshot, the CSV file will be used to edit the plan values for Headcount.
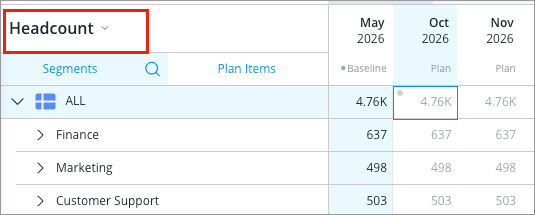
-
Click the Download data as spreadsheet button in the toolbar.
-
In the Download as spreadsheet dialog, click the For editing tab.
Note: The For editing option is only available when you're in Segments view and a plan item that can be edited is selected.
- Optional: To download the spreadsheet using the legacy format, turn on the Legacy formatting toggle. The toggle is off by default. You cannot add rows with the legacy format. For more information, see Edit plan values using legacy formatting.
-
Click Download.
Result: The file may take a few minutes to process. After it is processed, the file will download automatically.
Note: The CSV file has the following characteristics:
- Segment members appear as display names, not IDs.
- Only leaf rows are included. Leaf rows are the lowest-level rows in each segment hierarchy.
Edit the CSV file
Open the CSV file in the application of your choice. You can update plan values in existing rows and add new rows. Save the file after you make your changes.
Each row has one column for each segment in the plan structure. Plan value columns for each period follow the segment columns. Segment columns that don't apply to a row, such as a lower hierarchy level, are blank. You can leave these cells blank in new rows too.
Note:
- The exported CSV file uses commas as the default separator (delimiter). If your CSV editor uses another separator type such as semicolons, you'll have to change the separator setting to commas so values in the file appear correctly.
- The exported CSV file uses UTF-8 character encoding. In order for characters to appear correctly in Visier the imported file must also be set to Unicode (UTF-8).
- The separator and unicode settings can be configured when importing the exported file into your CSV editor.
- For the import to work correctly, the structure of the CSV file must match the structure (segmentation) of the assumption model or plan that is being edited. This means you cannot add or edit the plan dimensions in the CSV file. Plan dimensions are the segment columns.
Add new rows
To add a row, add a new line to the file. Enter members for segment columns, and then enter the plan values.
Note: The maximum number of new rows you can add in the CSV file is 2,000.
For example, let's say your plan is segmented by Organization Hierarchy Level 2, Organization Hierarchy Level 3, Organization Hierarchy Level 4, Location Hierarchy Country, and Location Hierarchy City.
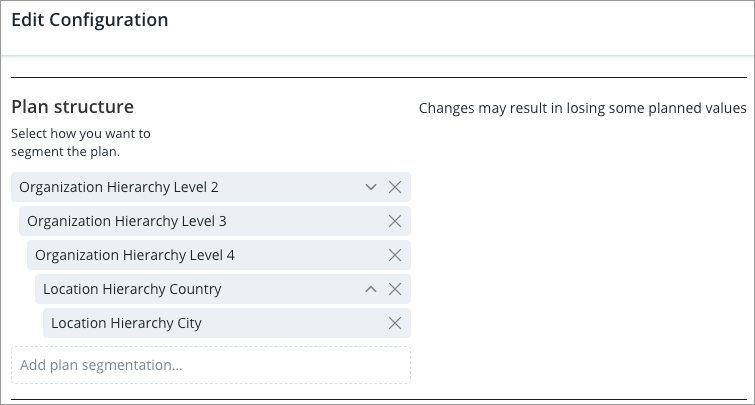
The CSV file will have one column for each of these segments, followed by a column for each period.
|
Organization Hierarchy - Level 2 |
Organization Hierarchy - Level 3 |
Organization Hierarchy - Level 4 |
Location Hierarchy - Country |
Location Hierarchy - City |
2026-10 |
2026-11 |
2026-12 |
2027-01 |
2027-02 |
2027-03 |
2027-04 |
2027-05 |
2027-06 |
2027-07 |
2027-08 |
2027-09 |
|---|---|---|---|---|---|---|---|---|---|---|---|---|---|---|---|---|
|
Finance |
Finance Americas |
Accounting - Finance Americas |
Canada |
Vancouver |
45 |
45 |
45 |
45 |
45 |
45 |
45 |
45 |
45 |
45 |
45 |
45 |
In this example, let's say you want to add the following four rows to the plan:
-
Sales, Sales West, Canada, Toronto
-
Marketing, Press Relations, Americas Press Relations, Canada, Vancouver
-
Sales, Sales Central, United States, Denver
-
Data Science, Data Science West, United States, San Francisco
To add each row, copy an existing row, change the members, and update the plan values. Leave the Organization Hierarchy - Level 4 column blank if the row doesn't have a Level 4 member.
|
Organization Hierarchy - Level 2 |
Organization Hierarchy - Level 3 |
Organization Hierarchy - Level 4 |
Location Hierarchy - Country |
Location Hierarchy - City |
2026-10 |
2026-11 |
2026-12 |
2027-01 |
2027-02 |
2027-03 |
2027-04 |
2027-05 |
2027-06 |
2027-07 |
2027-08 |
2027-09 |
|---|---|---|---|---|---|---|---|---|---|---|---|---|---|---|---|---|
|
Finance |
Finance Americas |
Accounting - Finance Americas |
Canada |
Vancouver |
45 |
45 |
45 |
45 |
45 |
45 |
45 |
45 |
45 |
45 |
45 |
45 |
|
Sales |
Sales West |
|
Canada |
Toronto |
8 |
8 |
8 |
8 |
8 |
8 |
8 |
8 |
8 |
8 |
8 |
8 |
|
Marketing |
Press Relations |
Americas Press Relations |
Canada |
Vancouver |
4 |
4 |
4 |
4 |
4 |
4 |
4 |
4 |
4 |
4 |
4 |
4 |
|
Sales |
Sales Central |
|
United States |
Denver |
10 |
10 |
10 |
10 |
10 |
10 |
10 |
10 |
10 |
10 |
10 |
10 |
|
Data Science |
Data Science West |
|
United States |
San Francisco |
12 |
12 |
12 |
12 |
12 |
12 |
12 |
12 |
12 |
12 |
12 |
12 |
Update plan values
To update existing plan values, change the values in the period columns of the rows that you want to edit.
Update plan values above the leaf level
You can also edit the plan value of a row above the leaf level instead of editing its leaf rows. Visier distributes the value to the leaf rows using the distribution method of the plan item. A blank segment column at the end of a row means the row is above the leaf level.
For example, let’s say Canada has leaf rows for Vancouver and Toronto under Finance, Finance Americas, and Accounting - Finance Americas. To update the plan value for Canada, do the following:
- In the CSV file, remove the Vancouver and Toronto rows. If the file includes both a row above the leaf level and its leaf rows, Visier uses the leaf row values and overwrites the value for the higher-level row.
-
Add a row for Canada. Leave the Location Hierarchy - City column blank, and then enter the plan values.
Organization Hierarchy - Level 2
Organization Hierarchy - Level 3
Organization Hierarchy - Level 4
Location Hierarchy - Country
Location Hierarchy - City
2026-10
2026-11
2026-12
2027-01
2027-02
2027-03
2027-04
2027-05
2027-06
2027-07
2027-08
2027-09
Finance
Finance Americas
Accounting - Finance Americas
Canada
70
70
70
70
70
70
70
70
70
70
70
70
When you upload the file, Visier updates the plan value for Canada and distributes the change to Vancouver and Toronto. Make sure the Roll up after upload toggle is on when you upload the file. With the toggle on, Visier updates the plan from the Canada row and distributes the value to Vancouver and Toronto. If you turn the toggle off, Visier updates only the Canada row. Vancouver and Toronto keep their old values, so they no longer add up to the Canada value. For more information about distribution methods, see How Plan Values Are Distributed.
Upload the CSV file and review the changes
-
In the planning grid, click the Upload spreadsheet button on the toolbar.
-
In the Upload spreadsheet dialog, click Select file and choose the CSV file on your computer, or drag and drop the file.
- Optional: To skip rolling up values after the upload, turn off the Roll up after upload toggle. The toggle is on by default. It rolls up values from the leaf levels of your plan after the upload, which resolves potential conflicts in the planning grid. For more information, see Solve Plan Value Conflicts. If you turn off the toggle, there is a high chance many child rows will not add up to the values of their parent rows. This is not something you can fix in bulk and will require manual editing.
- Optional: To upload the spreadsheet using the legacy format, turn on the Legacy formatting toggle. The toggle is off by default. It turns on automatically if you turned it on when you downloaded the file. The review steps are not included for legacy files. For more information, see Edit plan values using legacy formatting.
-
Click Upload.
Result: If your file contains only changed values, the plan is updated right away and skips the review steps. If your file contains new rows, the Review uploaded file dialog appears. The dialog shows the total number of rows that will be added.
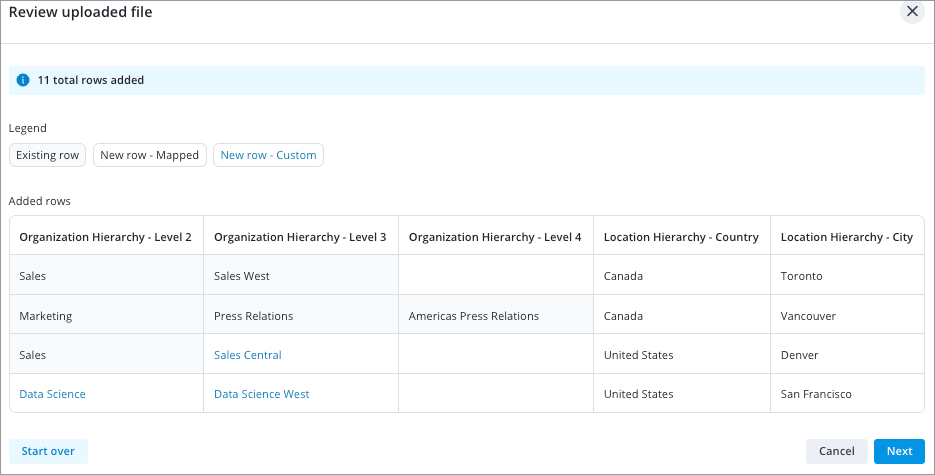
-
Review the added rows, and then click Next.
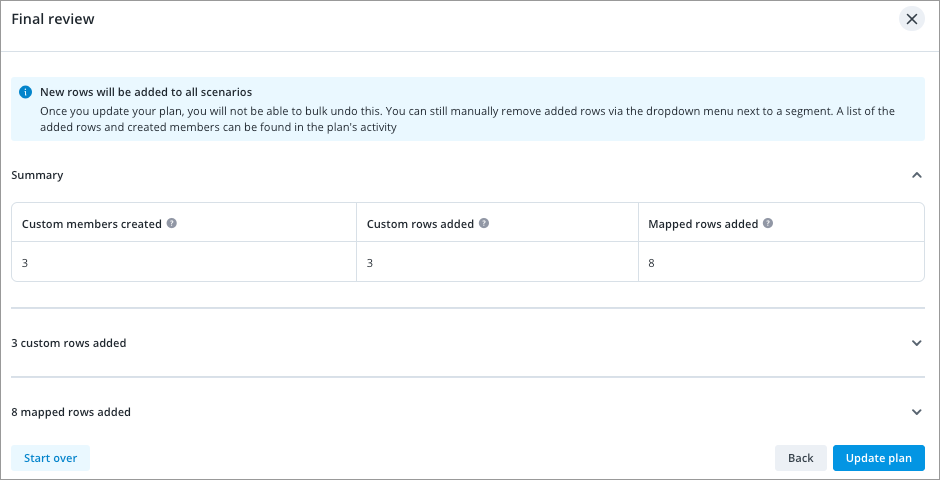
Result: The Final review dialog appears.
-
Review the summary, and then click Update plan.
Note:
- The maximum file upload size is 20 MB.
- You can cancel or restart the upload at any point before you update the plan.
- If you need to manually remove added rows after the update, see Remove a Segment.
Edit plan values using legacy formatting
- Download the CSV file for your plan from Visier.
- In the planning grid switch to Segments view.
Select the plan item you want to edit plan values for using the Context picker.
The exported CSV file will contain data that is similar to what is displayed in Segments view. Based on the selections in the following screenshot, the CSV file will be used to edit the plan values for Headcount.
- Click the Download data as spreadsheet button in the toolbar.
In the Download as spreadsheet dialog, click the For editing tab.
Note: The For editing option is only available when you're in Segments view and a plan item that can be edited is selected.
- To download the spreadsheet using the legacy format, turn on the Legacy formatting toggle. The toggle is off by default. You cannot add rows with the legacy format.
Click Download.
Result: The file may take a few minutes to process. After it is processed, the file will download automatically.
- Open the CSV file in the application of your choice and edit the plan values. Remember to save the file after making your changes.
Note:
- The exported CSV file uses commas as the default separator (delimiter). If your CSV editor uses another separator type such as semicolons, you'll have to change the separator setting to commas so values in the file appear correctly.
- The exported CSV file uses UTF-8 character encoding. In order for characters to appear correctly in Visier the imported file must also be set to Unicode (UTF-8).
- The separator and unicode settings can be configured when importing the exported file into your CSV editor.
- For the import to work correctly, the structure of the CSV file must match the structure (segmentation) of the assumption model or plan that is being edited. This means you cannot add or edit the plan dimensions in the CSV file. Plan dimensions are the segment columns.
- Upload the CSV file to Visier.
- In the planning grid, click the Upload spreadsheet button on the toolbar.
- Select the CSV file on your computer or drag and drop the CSV file to the Upload spreadsheet dialog.
- Optional: To skip rolling up values after the upload, turn off the Roll up after upload toggle. The toggle is on by default. It rolls up values from the leaf levels of your plan after the upload, which resolves potential conflicts in the planning grid. For more information, see Solve Plan Value Conflicts. If you turn off the toggle, there is a high chance many child rows will not add up to the values of their parent rows. This is not something you can fix in bulk and will require manual editing.
Click Upload.
Note: If you turned on the Legacy formatting toggle when you downloaded the file, the toggle will be turned on automatically.
Review the plan values in the planning grid to ensure your changes were imported correctly.
Note:
- The maximum file upload size is 20 MB.
- You can use the undo actions on the toolbar and planning grid to revert any changes made by the uploaded file.